Live facial recognition system using Python
Today it’s likely that you’ve encountered facial recognition in some form, whether it’s by using face-ID to unlock your phone, Facebook automatically tagging your friends in photos you upload, or Google Photos automatically creating albums of the people you often photograph.
The advancement of machine learning, and particularly deep learning used on images has made these functionalities increasingly accurate. In this post we’ll look at how to create a live facial recognition system using Python, with just 50 lines of code. By the end of the post your program will recognize faces from the live video feed from your webcam, based on the reference images you give the model.

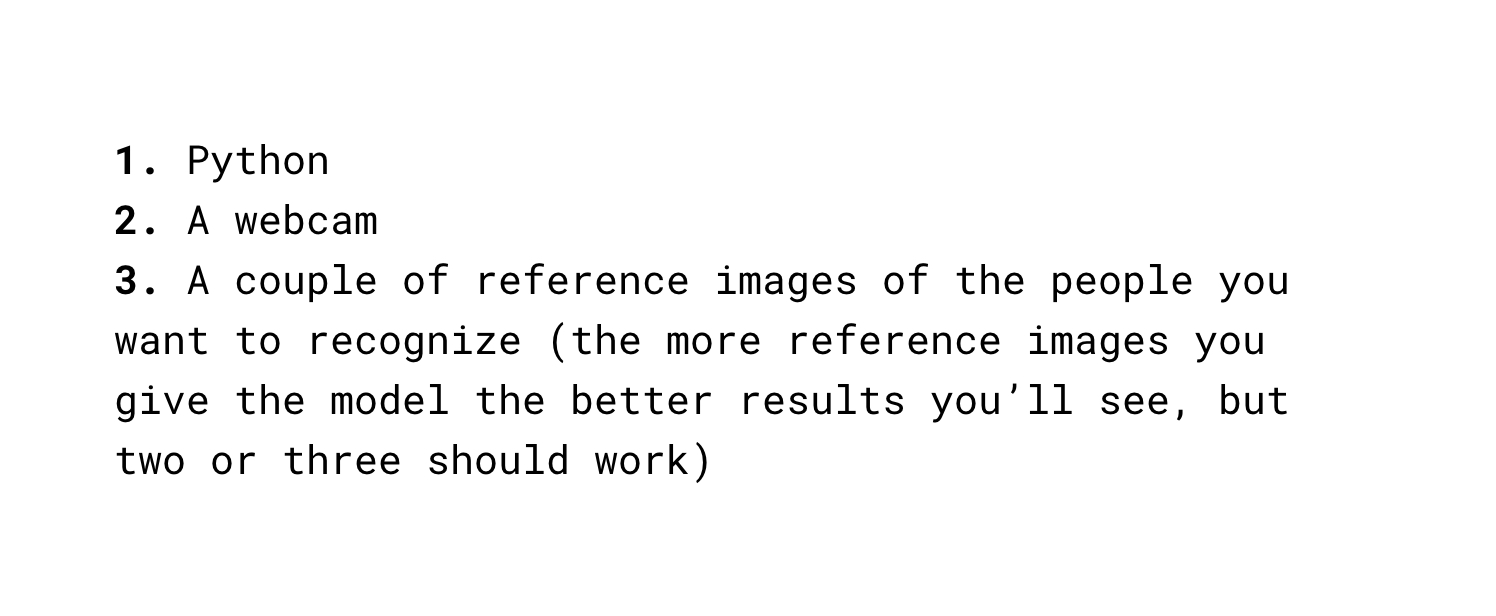
To implement the code on your own computer there’s three requirements, you’ll need:
- Python
- A webcam
- A couple of reference images of the people you want to recognize (the more reference images you give the model the better results you’ll see, but two or three should work)
The library we will use also supports GPU acceleration, which can improve speed and accuracy, but we will use the default models that works with CPU.
First, we’ll start by setting up our project. Inside our project folder we create a folder called ‘Images’, inside this folder we create subfolders for the people we want our program to recognize. I created folders for Erlend, Knut, and me – and put a couple of images in each folder (use images where only that person’s face is visible).
The folder structure will be:
Face recognition —> Images ————-> Aadne —> Reference images
extract_features.py Knut —> Reference images
live_webcam_recognition.py Erlend —> Reference images
The extract_features.py file is where we will be processing the reference images and extract the facial features – which later will be used to compare with the live video feed.
We start by importing the necessary libraries. It’s recommended to create a virtual environment where you install these libraries. I use Anaconda, but you can also install them with ‘pip install’, or directly in most IDE’s.
import face_recognition
import cv2
from imutils import paths
import pickle
import os
The ‘face_recognition’ library consists of functions that makes it easy to find where faces are localized in pictures, extract facial features, and compare these features. The library, available here, was created by Adam Geitgey and is based on Dlib.
Facial recognition consists of several different deep neural networks, for locating faces, for extracting the best features, and for comparing these features. Creating and training these networks requires huge amounts of data and computational power. Luckily, OpenFace has made several trained networks openly available. Which means that we can use them for our pictures without any training.
After importing the libraries, we extract the paths for all images in our ‘Images’ folder and put them in a list. We also initialize two lists where we will store the encodings (features) and names for each image.
imagePaths = list(paths.list_images('Images'))
foundEncodings = []
foundNames = []
We then create a for loop for looping over all the image paths
for (i, imagePath) in enumerate(imagePaths):
Inside the for loop is where we will locate the faces and extract the encodings:
    #Extract person’s name from path
    name = imagePath.split(os.path.sep)[-2]
    #load the input image and convert it from BGR (Opencv) to dlib ordering
(RGB)
    image = cv2.imread(imagePath)
    rgb = cv2.cvtColor(image, cv2.COLOR_BGR2RGB)
    #Locate faces and save coordinates of a bounding box
    boxes = face_recognition.face_locations(rgb,model='hog')
    # compute the facial encodings
    encodings = face_recognition.face_encodings(rgb, boxes,model='large')
    # loop over the encodings
    for encoding in encodings:
        foundEncodings.append(encoding)
        foundNames.append(name)
Inside the for loop, we start by extracting the name from the image path, as all images are inside a named folder.
We then load the image using cv2, and then convert it to RGB from BGR, as OpenCV and Dlib have different color orderings.
Then, we use the face_locations function from face_recognition to get the coordinates of bounding boxes of faces in the image. The faces are found using the Histogram of Oriented Gradients (HOG) method. The face_locations function returns a list of tuples of found face locations in (top,right,bottom,left) order.
Using the face_encodings function, with the image and the face location (boxes) as input, we get the 128-dimensional face encodings (features) for each face in the image. The pretrained model is included in the face_recognition library.
For each image, the encodings and name are added to their respective lists.
data = {"encodings": foundEncodings, "names": foundNames}
#use pickle to save the dictionary
f = open("face_enc", "wb")
f.write(pickle.dumps(data))
f.close()
Lastly, we create a dictionary with the found encodings and names and store them locally using Pickle.
Running this file will iterate through our reference images and create a file with encodings and names that we will use for the live facial recognition.
We then move to the live_webcam_recognition.py file. We start by importing libraries
import face_recognition
import pickle
import cv2
import numpy as np
Then, we load the face encodings and names we got from extract_features.py
data = pickle.loads(open('face_enc', "rb").read())
known_encodings = data['encodings']
known_names = data['names']
We then use OpenCV (cv2) to access the webcam, and we loop over the captured frames from the live video
video_capture = cv2.VideoCapture(0)
# loop over frames from the video stream
while True:
The facial recognition is done inside the while loop. We start by grabbing the frame from the video, and converting the frame to RGB ordering:
    ret, frame = video_capture.read()
    # convert the input frame from BGR to RGB
    rgb = cv2.cvtColor(frame, cv2.COLOR_BGR2RGB)
As when we extracted encodings from the reference images, we find face locations and extract face encodings from the current frame:
    #find face locations
    boxes = face_recognition.face_locations(rgb,model='hog')
    # the facial encodings for faces in the frame
    encodings = face_recognition.face_encodings(rgb,boxes,model='large')
In the live webcam feed, there can be several faces at the same time. Therefore, we loop through each of the found faces in the current frame:
    # Loop through found faces in this frame
    for (top, right, bottom, left), face_encoding in zip(boxes, encodings):
Inside this for loop we will do the facial recognition:
        # See if the face is a match for the known face(s)
        matches = face_recognition.compare_faces(known_encodings, face_encoding,
        tolerance=0.6)
        name = "Unknown"
        #Use the known face with smallest distance to the new face
        face_distances = face_recognition.face_distance(known_encodings,
        face_encoding)
        best_match_index = np.argmin(face_distances)
        if matches[best_match_index]:
            name = known_names[best_match_index]
        cv2.rectangle(frame, (left, top), (right,bottom), (0, 255, 0), 2)
        cv2.putText(frame, name, (left+6, top-12), cv2.FONT_HERSHEY_SIMPLEX,
            0.75, (0, 255, 0), 2)
We start by comparing the 128-dimensional encoding of the current face (in the current frame), to the known encodings we got from the reference images. The compare_faces function calculates the euclidean distance between the current face encoding and the known encodings and returns a list of True/False depending on whether the distance is over 0.6 or not.
Then, we use the face_distance and argmin functions to find the known face with the smallest euclidean distance to the current face. If one of the known faces are close enough to the current face, we set the name to match that known name, otherwise the name will remain “Unknown”.
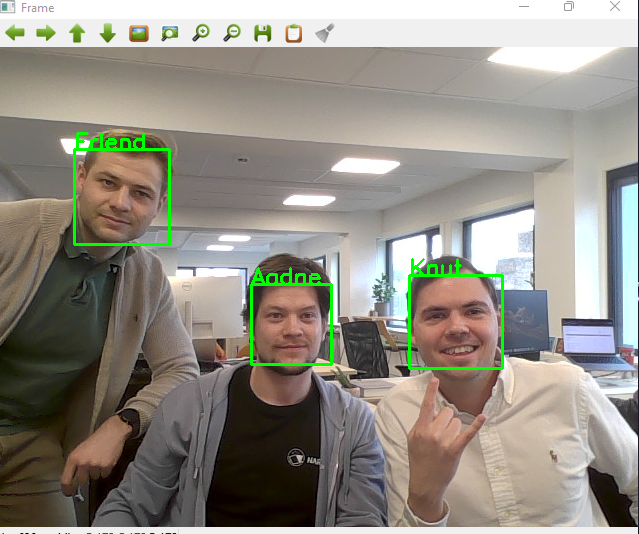
To show our findings we draw a bounding box around the found face, along with the found name.
cv2.imshow("Frame", frame)
    if cv2.waitKey(1) & 0xFF == ord('q'):
        break
video_capture.release()
cv2.destroyAllWindows()
The webcam feed is shown using cv2.imhow, and we set the program to interrupt when “q” is pressed. The video capture is then released, and the webcam window/feed is closed.
By running the extract_features.py file, followed by running the live_webcam_recognition.py file, your facial recognition program should be up and running! Here’s a screenshot of when we ran it here at the office.
To show our findings we draw a bounding box around the found face, along with the found name.
That’s it, how to create a live facial recognition system using Python, a simple example of a machine learning program in just 50 lines of code!
If you have a machine learning project you’d like to initiate or discuss, don’t hesitate to contact us.
To show our findings we draw a bounding box around the found face, along with the found name.
In Gture, we connect dreamers with doers.
Book a meeting to help your company digitalize your business.